Let’s say you’re developing your video game. You have the assets for all the materials, but then you want some heavy rain to wet them. Can you automate that and avoid the pain of re-editing all of your materials? How do the optical properties of a material change when it’s wet? To answer those questions, let’s go back to what happens in nature.
This article sums up a great internship I did at INRIA, supervised by Pascal Barla & Gaël Guennebaud.
Optical properties of wet materials
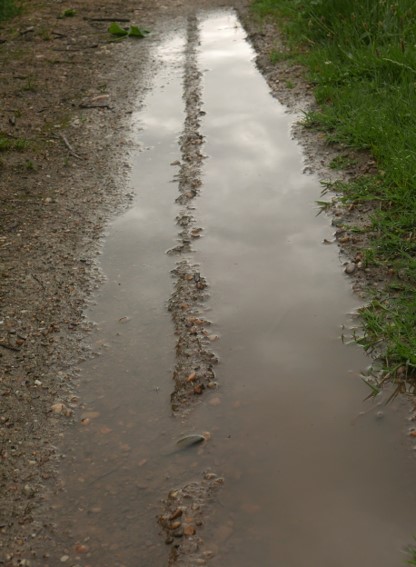

When you observe wet materials in the nature, you can extract two main information:
- The porous materials absorb water, leading to different levels of wetness that we’re gonna describe later.
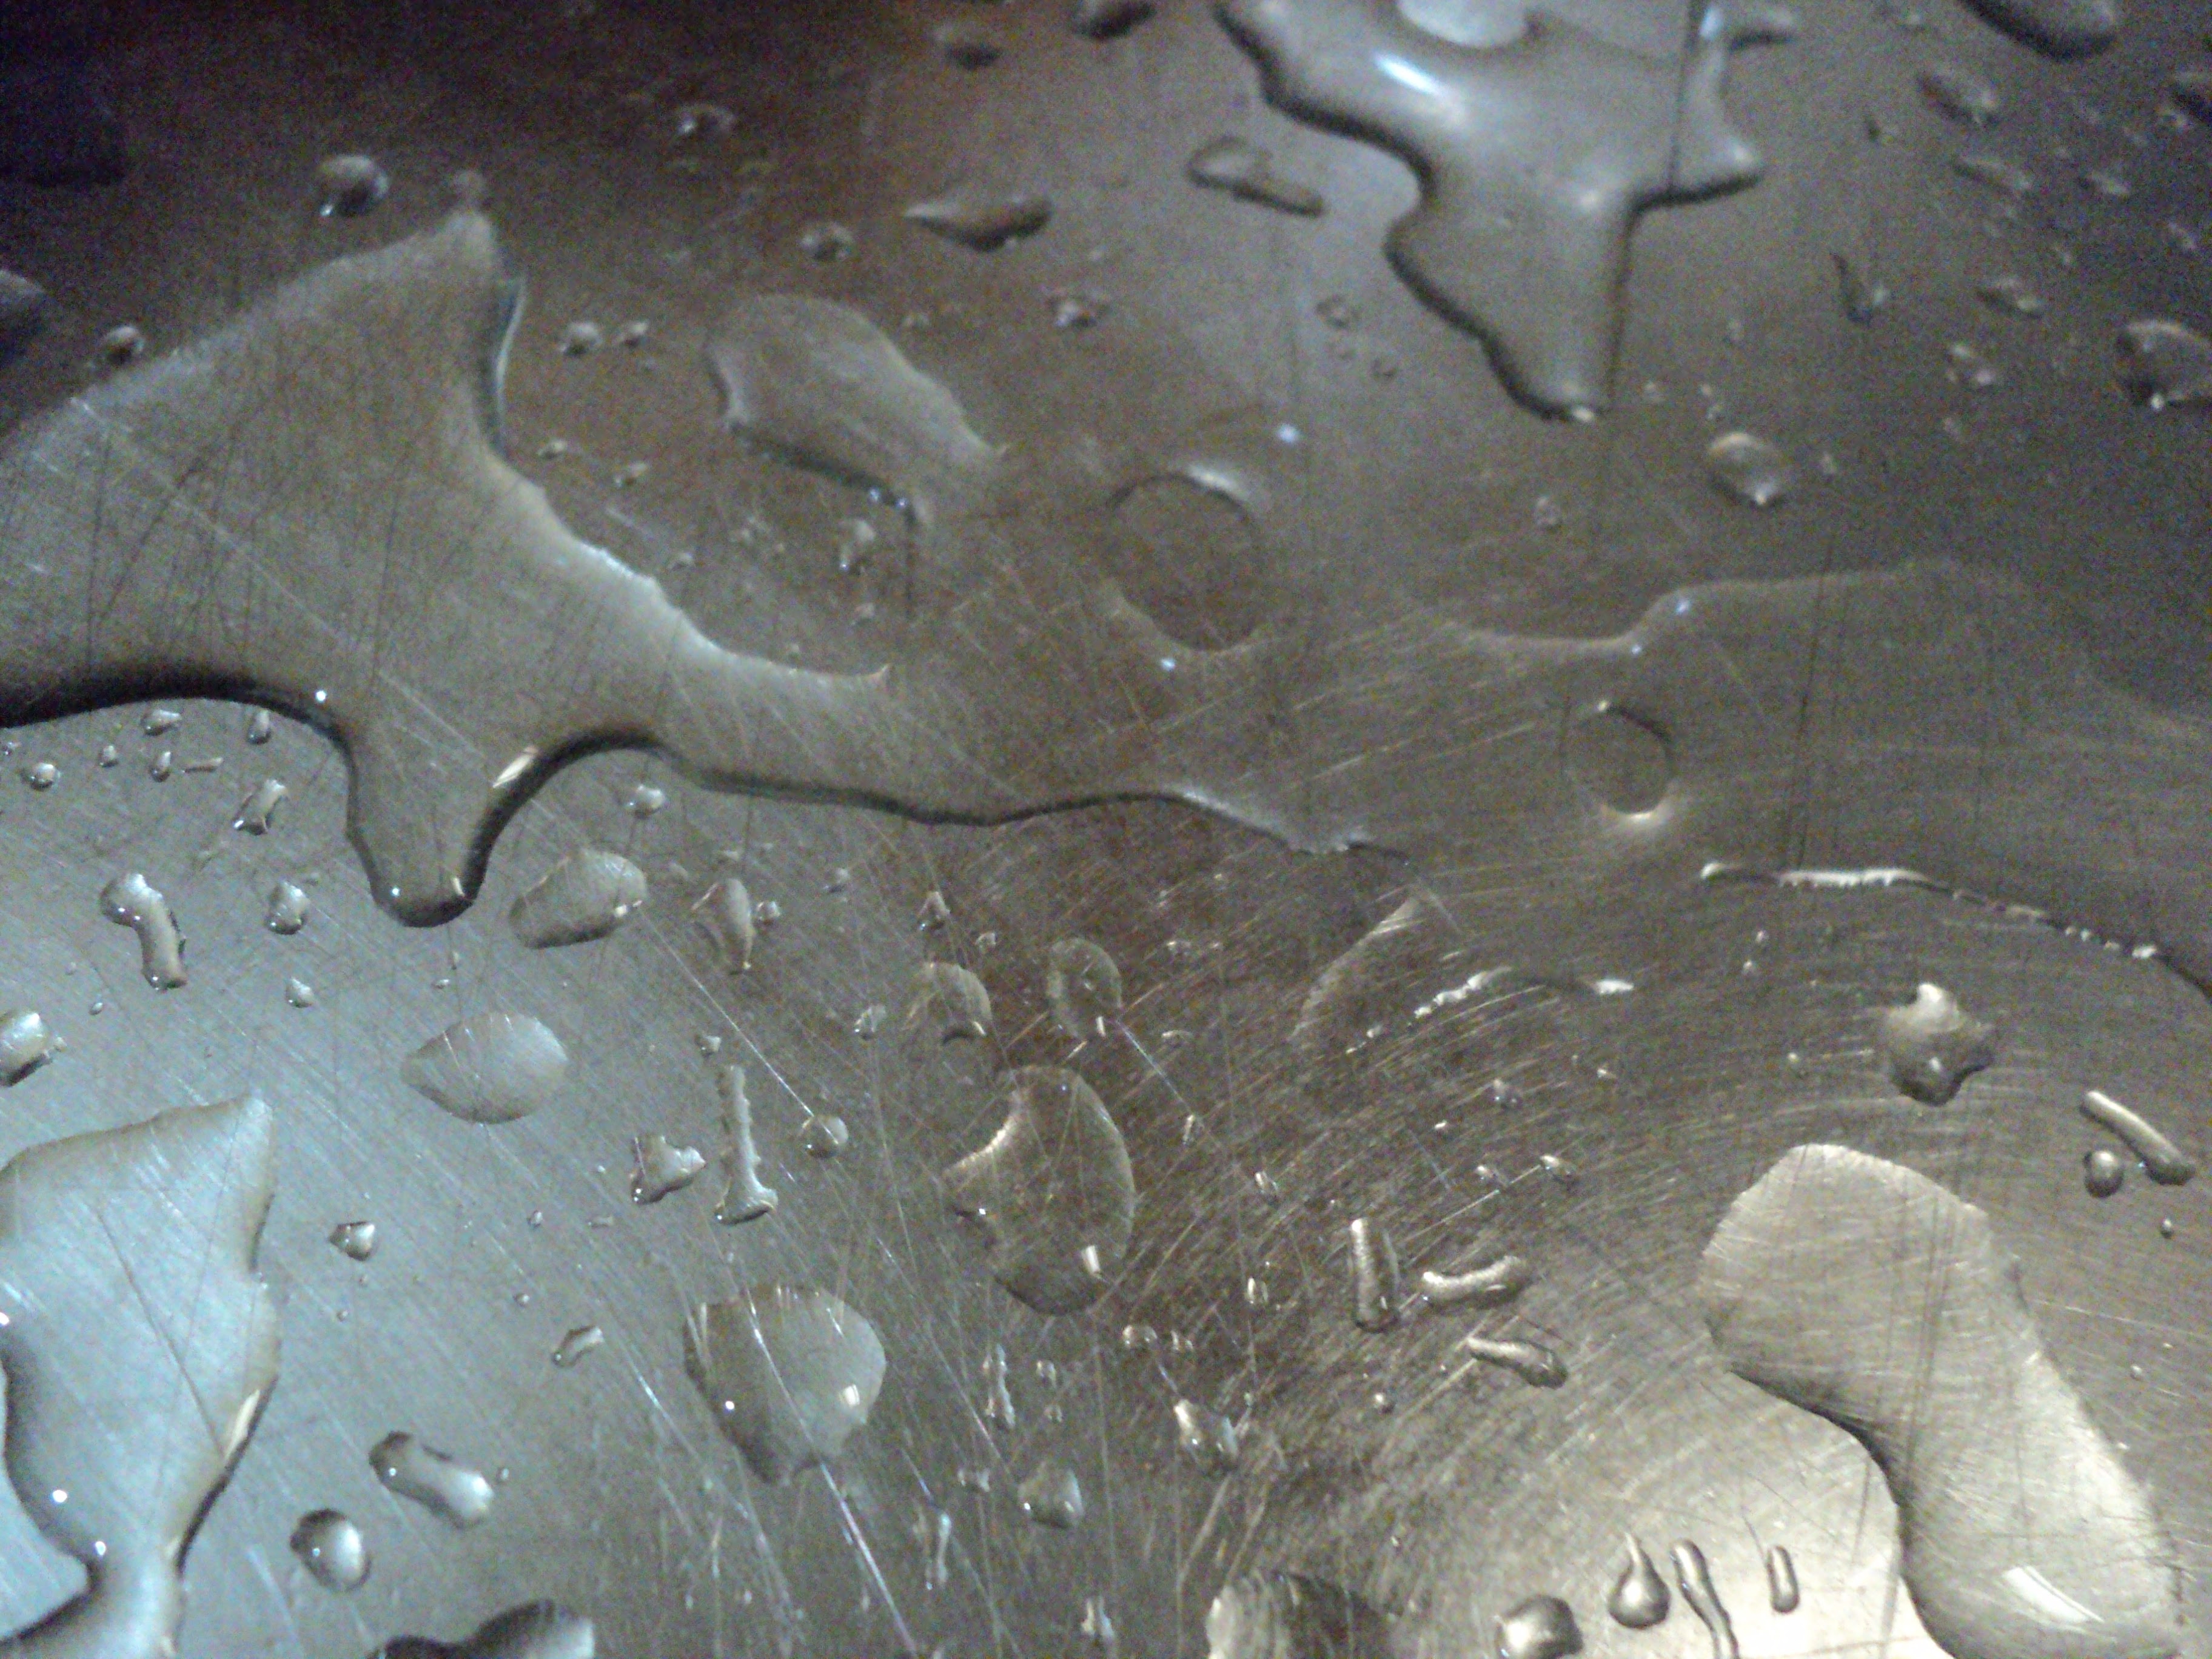
- Non-porous materials (e.g. metals or plastic) do not absorb water at all. Thus, the water just lies on top.
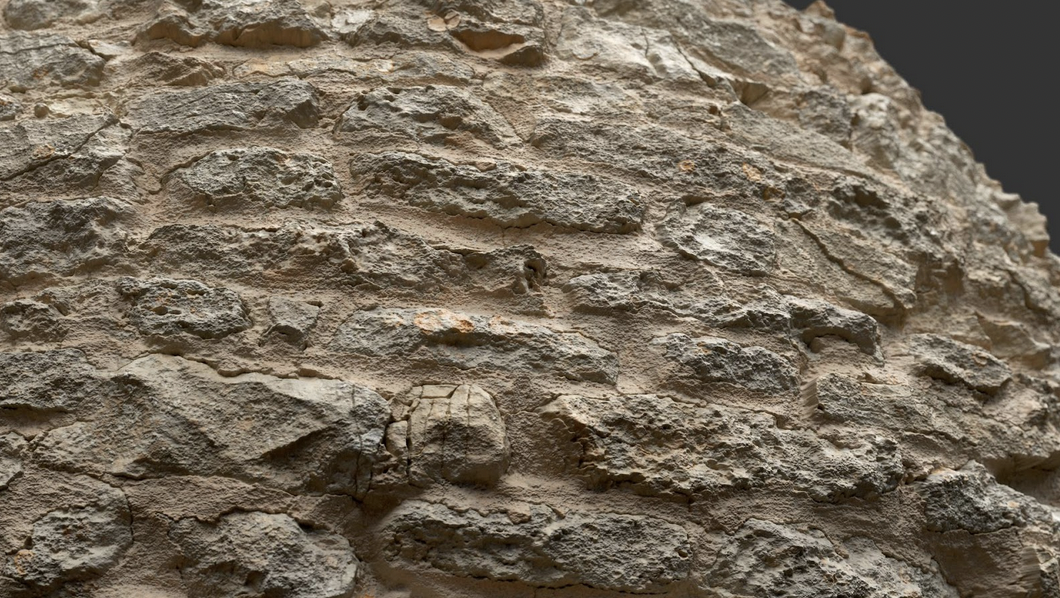
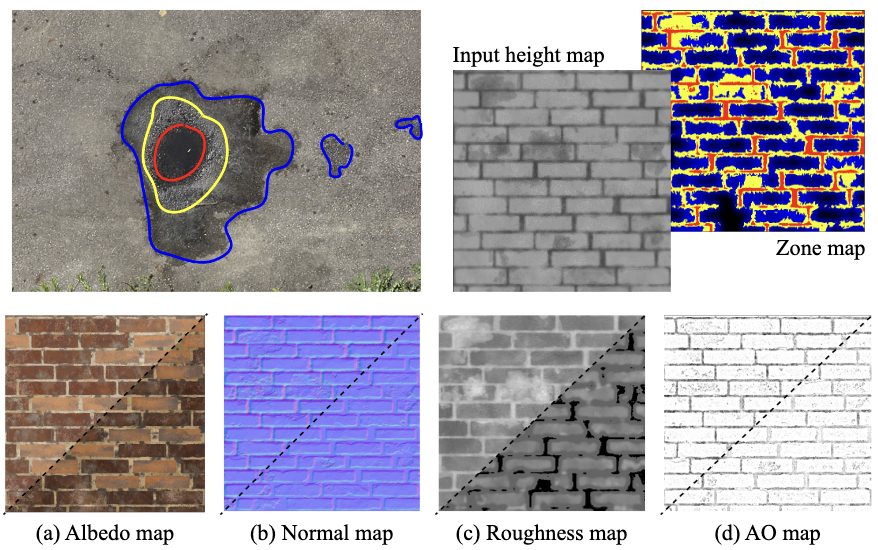
Porous materials immersed in water can be described with the Figure 1, coming from Sawayama [1].
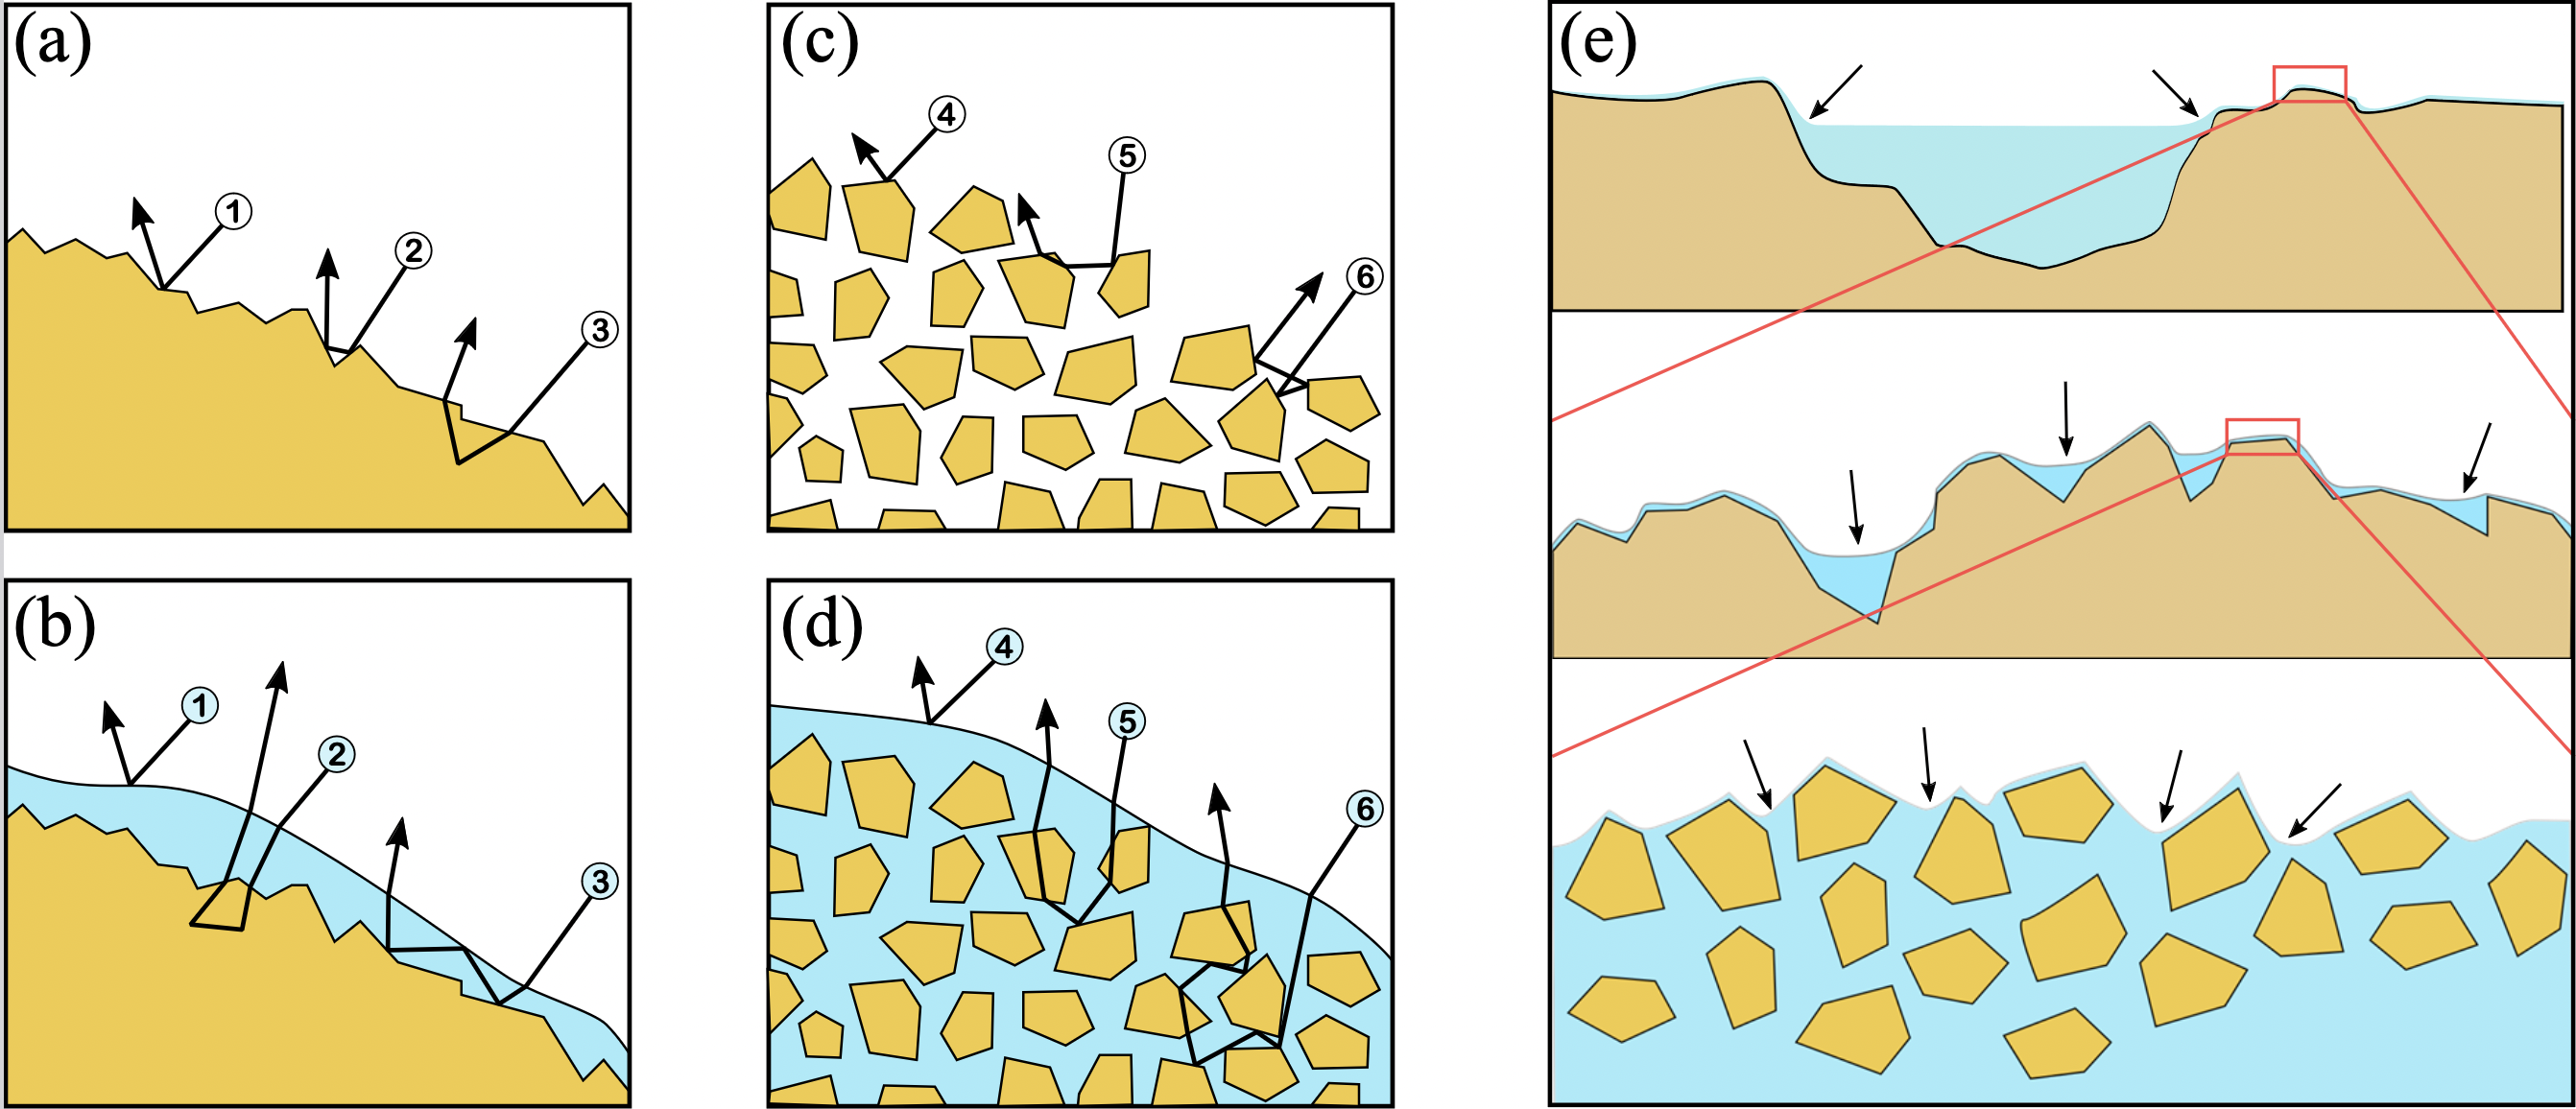
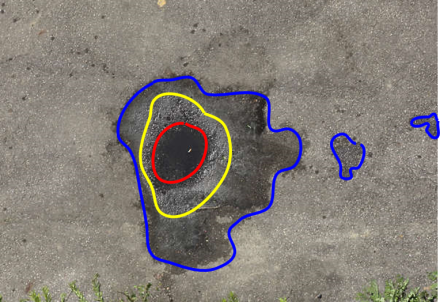
We chose to enumerate three different zones of wetness for a porous material:
- immersed, where the water surface is clearly visible and flat.
- wet, where the water conforms to the shape of the material, resulting in specular reflections.
- moist, where the water has already been absorbed, leading in a darker material without specular reflections (since there’s no water layer on the surface).
Now that we’ve finished our walk through this wet world, let’s go back in our dry room, start our PC, and check what already exists concerning wet materials.
Wet materials on Adobe Substance Designer
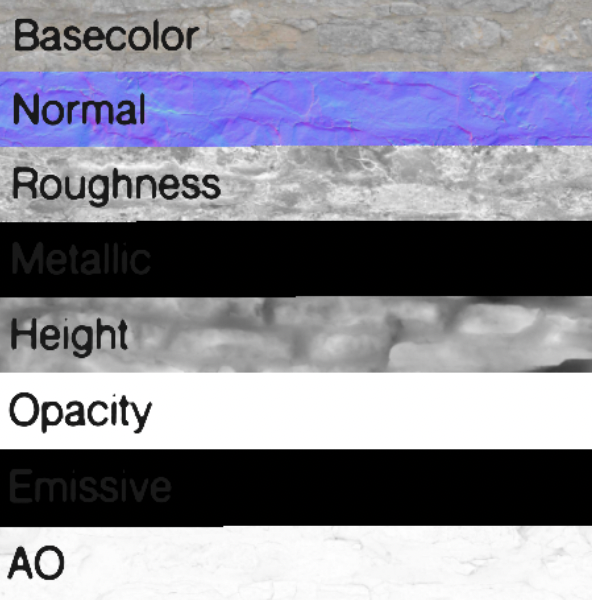
Substance Designer is a powerful software from Adobe allowing artists to generate textures of procedural materials, following the PBR Workflow. With this workflow, every aspect of the material is stored in a texture, which is then interpreted by the shader as its color, normal (direction of the reflected light), roughness, metallic, height, opacity, emissive part and ambient occlusion (places that the light can’t reach).
Substance Designer is based on Node Graph. It ships by default a node named “Water Level” on which you can plug any material. This node allows artists to control the water height and the wet zone based on the material height map:
However, we noticed axes of improvements:
- There’s no moist zone (where water has been absorbed)
- Lack of control of the zones
- No surface tension, leading to too sharp water edges
- The immersed part erases the existing height under the water surface
- The refraction is not taken into account
My own Substance node
I created a brand new Substance graph, following this logic:
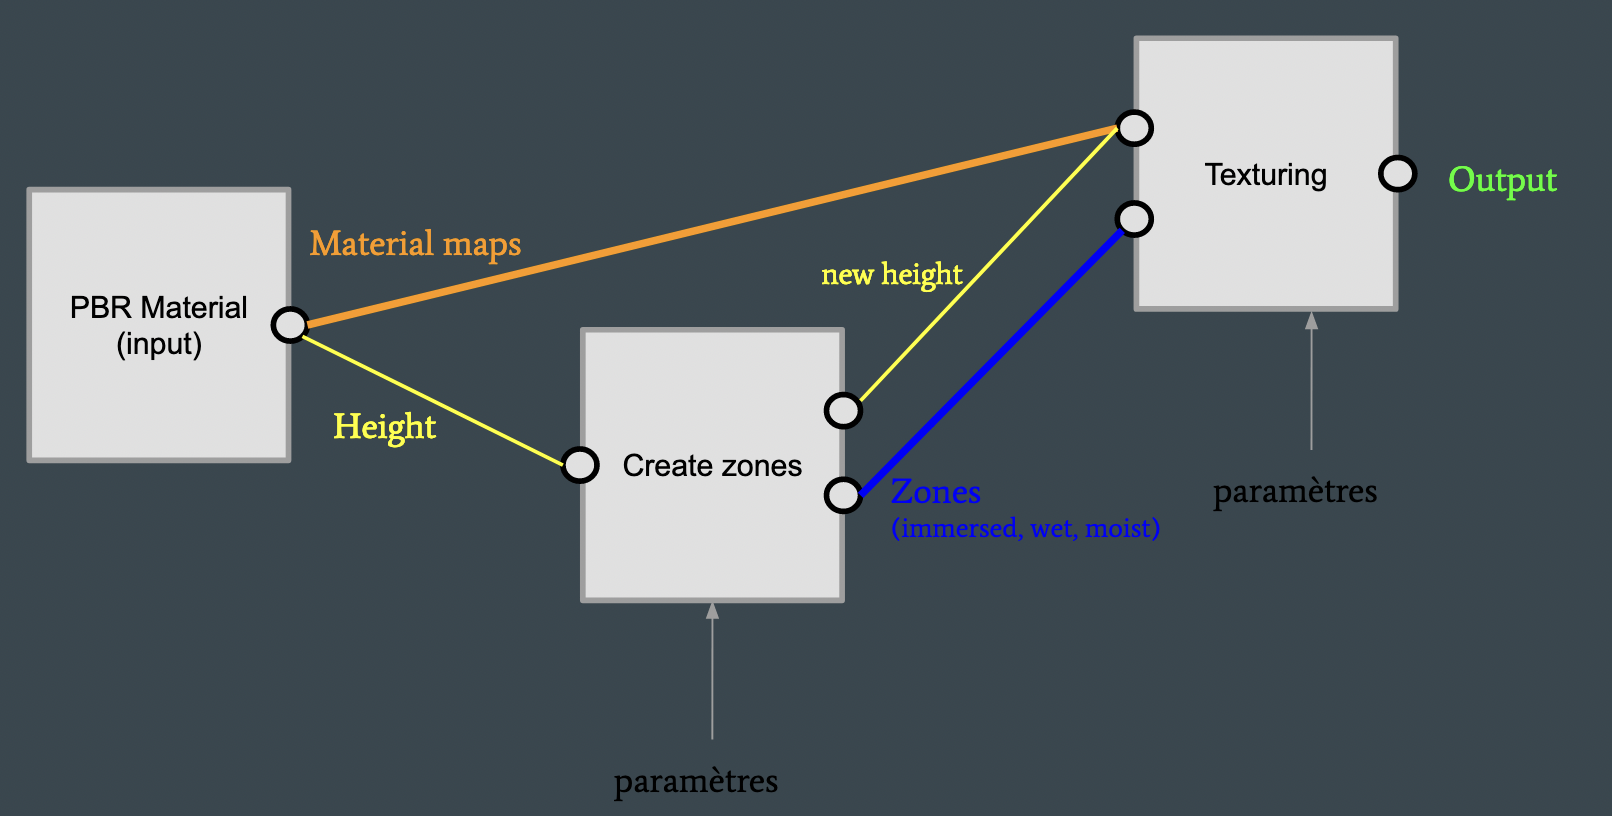
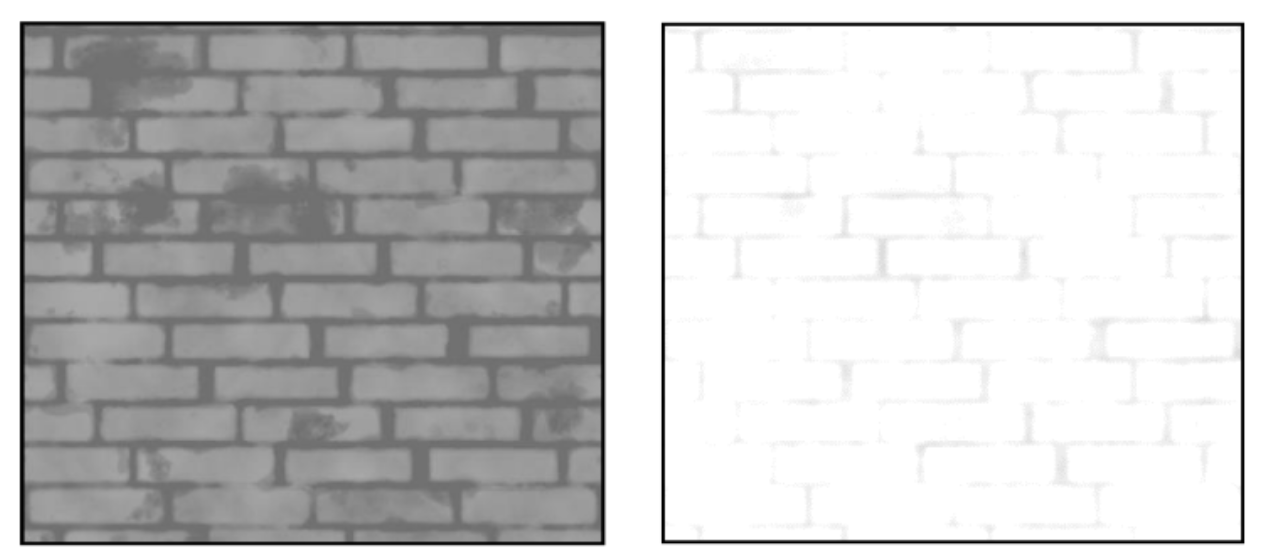
The height is extracted from the material and is used to calculate the masks of the different wet zones (immersed, wet & moist). These masks are then used to generate the different textures.
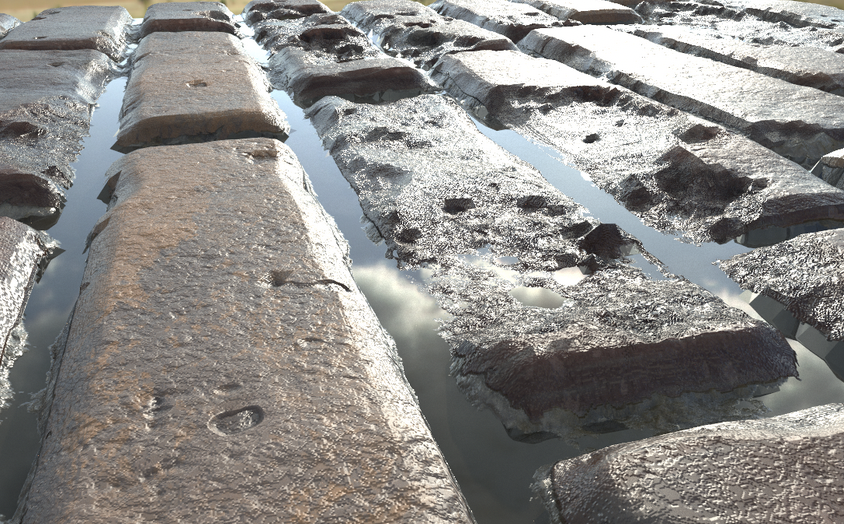
Here are the final results:

Imitating refraction
The limitation with the used PBR workflow is that a material can only have one height per pixel. Thus, the immersed zone (in red) erases the existing height under the surface. Since Substance Designer can load custom shaders, I thought about “hacking” the existing shader to simulate refraction in real time.
Here is the shading worklow of Substance Designer:

The PBR Maps from the material are feeded in the shader worklow. Tesselation shader is responsible for displacing the vertices along the height map, and fragment shader computes the final color of the pixel.
There are two ways of creating height out of material: tesselation, which modifies the mesh itself, and parallax, which modifies the texels position according to the camera position to imitate depth.
By adding parallax after tesselation, we can create depth under the water surface. This implies that we have to feed a new PBR map to the shader workflow, a map containing the material height under the surface.
I spare you the technical details of the implementation, but if you are curious, you can download my shader here:
Note: this was coded in 2019 and I have no guarantee that this still works, I didn’t try it out with then new versions of Substance Designer.
Conclusion
What we can learn from this project is the importance of details in our perception of materials. Surface tension greatly improves realism.
You can find the full detailed report (in french) here:
References
[1] M. Sawayama, E. H. Adelson, and S. Nishida, “Visual wetness perception based
on image color statistics,” Journal of Vision, vol. 17, 06 2017.
1 comment so far